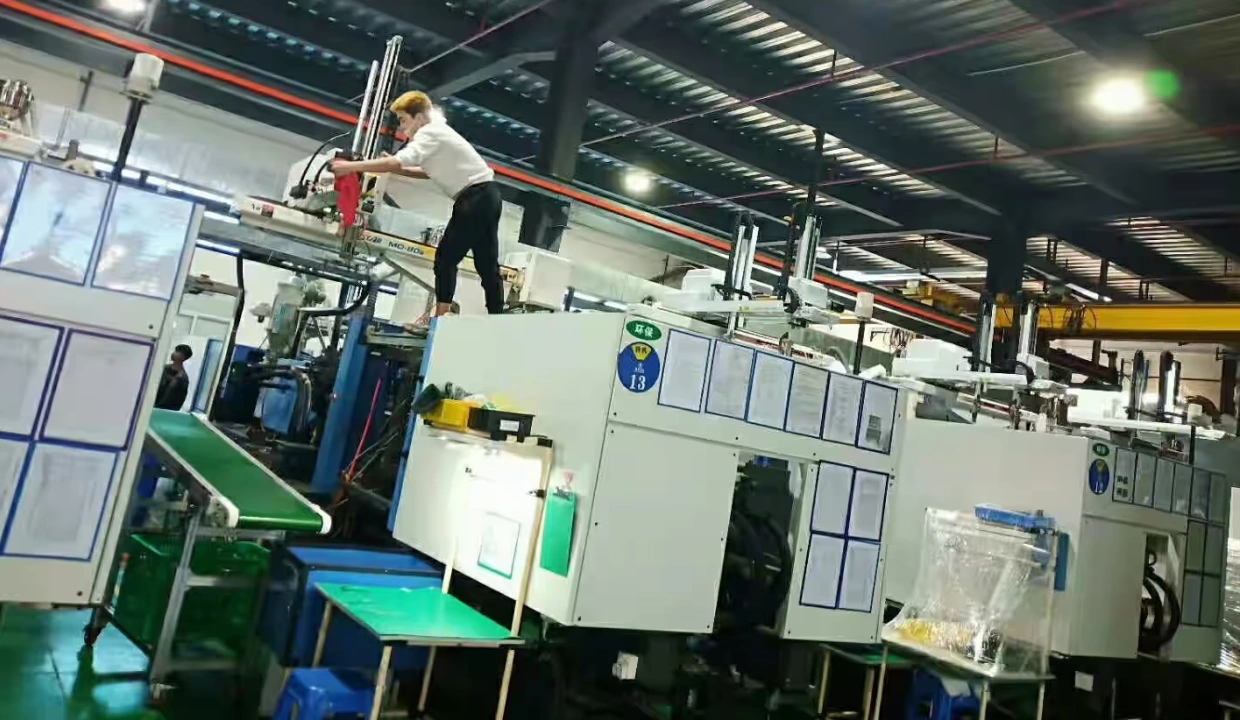
1、Injection Molding Principle
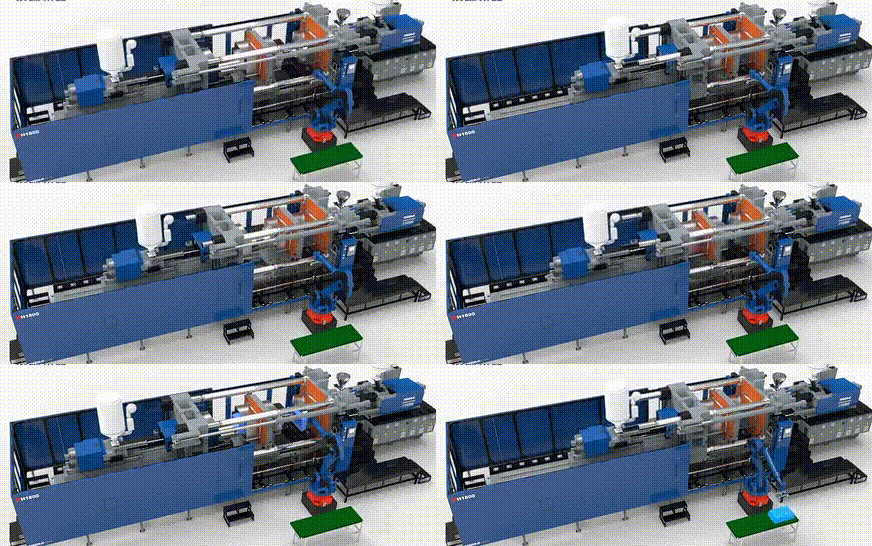
- Pre-Plasticizing Process
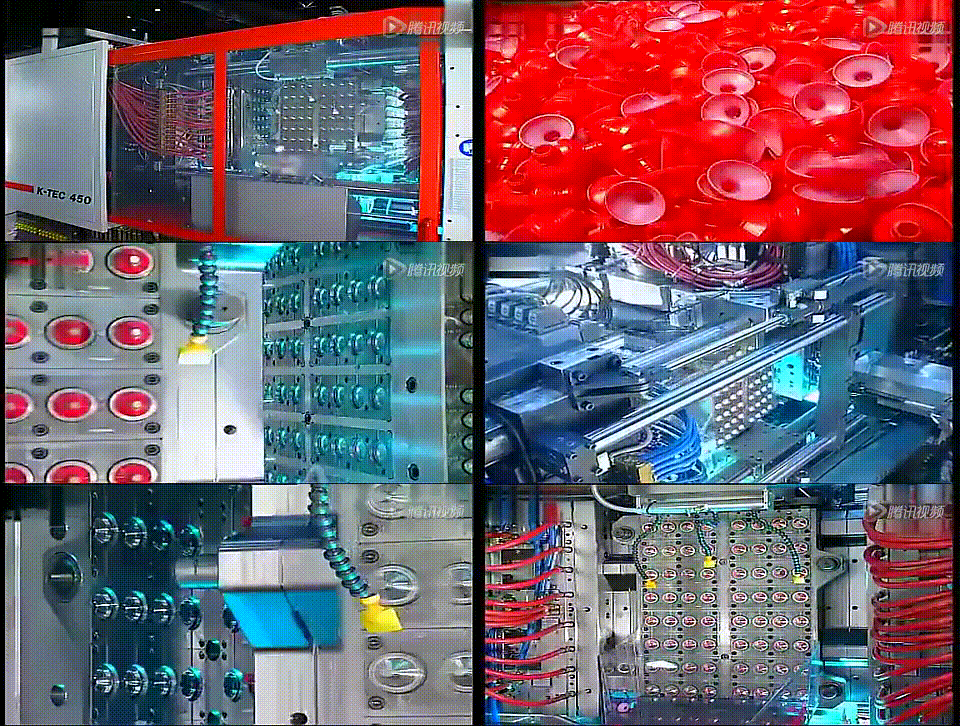
First, the plastic is dried according to the material requirements. For example, ABS material is dried at 80°C for 1-2 hours. For engineering plastics, a dehumidifier must be used to remove moisture and humidity completely. Next, the pre-plasticizing process begins: the heating barrel is externally heated to achieve the required internal temperature through thermal equilibrium. Solid plastic pellets are then added to the hopper, and using the screw return method, the pellets are fed into the heating barrel. Due to high-temperature conduction, the pelletized plastic is melted by thermal energy, transforming from a granular state into a viscous liquid state. Through the shearing and compression of the screw threads, its density and viscosity are evenly adjusted. This completes the first stage of the pre-plasticizing process. - Pressure-Holding Phase
The second stage is the pressure-holding phase. After the first stage of injection is complete, the injection pressure must be maintained to ensure continuous flow of the material. Before the liquid in the mold cavity has completely cooled, additional pressure is applied to increase the product’s density. This is the function of the pressure-holding phase. - Cooling and Shaping Process
When the holding pressure is completely removed, the liquid in the mold cavity continues to be influenced by the mold’s temperature, causing it to begin cooling, solidifying, and shaping. As time passes, the temperature decreases until the product reaches a level of stability and deformation that allows it to be ejected after the mold is opened, and the product is considered acceptable. This process is called cooling and shaping. With the completion of these three major steps, the injection molding process is finalized.
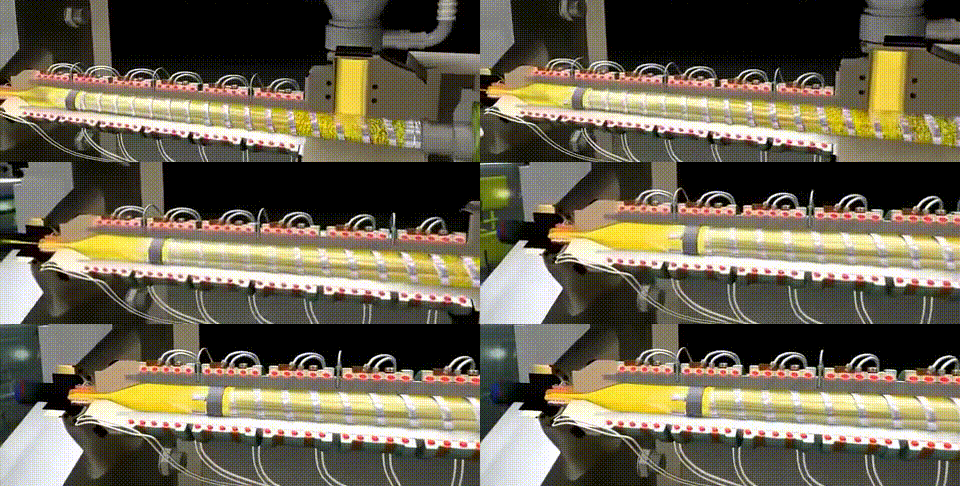
2、Principle of the Screw
The primary functions are conveying, melting, mixing, compressing, and metering—five key roles. Therefore, it plays a crucial role in the quality of plasticization and can be considered the heart component of the injection molding machine, directly affecting the quality of the molded products.
The entire screw is divided into three sections: the metering section, the compression section, and the feeding section.
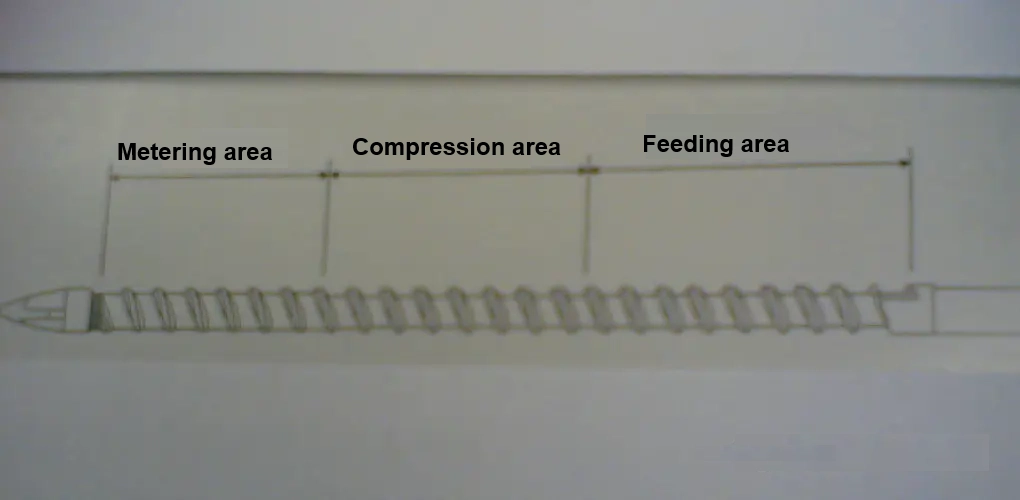
- Feeding area
Solid pellets are fed into the screw groove from the hopper. Due to the rotation of the screw, a shearing effect is created, and with the heat conduction from the barrel, the material begins to melt. In other words, in this stage, the pelletized material is plasticized into a molten liquid. - Compression area
The main functions are to continue melting the molten plastic, mixing, shearing, compressing, increasing pressure, and venting. In this stage, the plastic fully melts, and its volume decreases, so the design of the screw’s compression ratio is very important. - Metering area
The main functions are mixing, melting, conveying, providing sufficient pressure, maintaining a uniform melt temperature, and ensuring a stable flow of molten plastic. If the metering section is long, the mixing effect is good, but if it is too long, the melt may stay in the barrel for too long, leading to thermal degradation. On the other hand, if the section is too short, it can result in uneven temperatures and poor plasticizing and melting performance. - Factors affecting plasticizing quality:①Screw length,② Screw thread depth
Screw length-to-diameter ratio (L/D ratio) = Screw working length (mm) ÷ Screw diameter (mm)
The commonly used ratio is 1:20. If the screw is longer, the plasticizing effect is better, and the mixing effect is more uniform. Materials such as PA, PE, PP, and POM require a longer screw.
Screw compression ratio = Depth of the feeding section (mm) ÷ Depth of the metering section (mm).
The compression ratio has a direct impact on plastics. A suitable compression ratio can increase the density of the plastic, making the molecular bonds tighter, which helps reduce the amount of air that gets trapped, lowers the temperature rise caused by pressure, and minimizes variations in output. However, if the compression ratio is inappropriate, it may damage the properties of the plastic. The higher the compression ratio, the greater the temperature rise during the plasticizing process inside the barrel, which in turn significantly reduces the output. The deeper the threads in the feeding section, the larger the feeding volume, but the torque required for the screw also increases, leading to a higher compression ratio. If the thread depth in the feeding section is too shallow, the compression ratio will be smaller, making it easier for the plastic to overheat, burn, or turn yellow.
Appropriate compression ratios: PE 1:1.7~2.2、 ABS 1:2~2.5、 PP 1:2.2~3、 Nylon 1:1.8~2.5。
The reason why transparent PC often turns yellow and gets burned during production is due to the extended residence time of the PC in the barrel and an excessive screw compression ratio. During the return material process, the material is subjected to thread shear and temperature rise, resulting in burning.
3. Precautions Before Machine Adjustment
Check whether the barrel temperature of the injection molding machine is normal and meets the required temperature for the material. Ensure the plastic is properly dried, check the mold temperature, and confirm whether the ejector pins have returned to position and if they interfere with other moving parts. Once these issues are confirmed to be OK, you can proceed with the adjustments.
Set the holding pressure position to zero and the holding pressure value to zero. Set the injection pressure to a mid-range value, the injection speed to a mid-range value, and the final stage injection speed to 20% or below. The shot volume should be determined based on the size of the product. For machines under 180T, the injection endpoint should be between 10mm; for machines over 180T, it can be between 20mm. Why control it within 10mm and 20mm? The main goal is to avoid pressure loss at the front end of the screw and ensure product stability.
4. Starting the Adjustment Process
For the first shot, if the injection endpoint is over 20mm and the product is still not filled, pressure must be increased. Each pressure increase should not exceed 7%, continuing until the product is filled. This sets the optimal shot volume. Conversely, if the product is filled but the endpoint still exceeds 20mm, reduce the material volume until the product is filled and the endpoint is within 20mm. If the injection position has already returned to zero, indicating that all material in the barrel has been injected but the product is still not filled, increase the shot volume until it meets the above criteria. Then, set the switching position for the holding pressure.
5. Best Holding Pressure Switching Position
Regardless of the injection mode, the correct setting of the switching position is crucial. To achieve optimal production and high-quality products, it is essential to ensure that 98% of the material volume is injected into the mold cavity before switching to holding pressure. If the switch is made too early, with less than 95% of the material filling the mold cavity, holding pressure must be used to push more material into the cavity, which can easily lead to incomplete filling and poor product stability, resulting in shrinkage and deformation. On the other hand, if the switch is too late, with more than 98% or even 100% of the material filling the mold cavity, excessive compression occurs, causing many areas to have flash and internal stress, making demolding difficult and possibly damaging the mold, as holding pressure and injection pressure are not the same.
Calculation method for the correct switching position:
Correct switching position = material quantity – [(material quantity – endpoint position) × 98%].
For example: 95 – [(95 – 8) × 98%] = 9.74mm.
6. Best Back Pressure Adjustment Level and Method
Working principle of meltback pressure: Based on the speed and pressure set by the computer, oil is supplied to the melt motor, causing it to rotate. During rotation, the screw transports the material, already melted in the barrel, to the front of the screw, where the material receives pressure. After overcoming the resistance of the screw’s backward system, the screw can retreat. In addition to this system resistance, there is also the back pressure created by the return oil resistance of the injection cylinder. We usually adjust the size of the back pressure by adjusting the return oil pressure. The looser the back pressure screw, the lower the return oil pressure, and the lower the back pressure. The correct adjustment method is based on preventing rapid overflow of material from the nozzle.
Control of back pressure: The effect of screw back pressure on the melt temperature is closely related to the properties of the polymer. During screw pre-plasticizing, the screw retreats under the pressure of the material, and the return oil from the injection chamber flows back into the oil tank through the back pressure valve. This establishes the melt pressure at the front of the screw using the back pressure valve’s return oil pressure. Through this adjustment, the shear force of the melt is controlled, improving the mixing and compaction of the material, and helping to expel air trapped in the material.
In summary, increasing back pressure increases the resistance in the return material system. If the screw’s retreat speed slows down, it prolongs the heating process of the material in the screw, altering the plasticizing effect. Therefore, back pressure plays a critical role in the entire molding process.

7. The Entire Molding Process
The complete molding process, in sequence, includes preparation before molding, the injection process, and post-processing of the plastic parts.
Preparation Before Molding:
This includes inspecting the raw material’s appearance and testing its process performance. The raw material should be preheated and dried sufficiently. Before changing materials, the barrel must be cleaned. Inserts in products with embedded components should be preheated, and release agents should be used for products that are difficult to de-mold. Due to variations in raw materials, forms, product structures, the presence of inserts, and usage requirements, the preparation work for different molded parts is not entirely the same.
The process generally includes feeding, plasticizing, injection, cooling, and demolding.
(1) Feeding: Injection molding is an intermittent process, so material must be fed in measured quantities to ensure stable operation, uniform plasticization, and high-quality molded parts.
(2) Plasticizing: The plastic introduced into the barrel is heated and transformed from solid particles into a viscous fluid with good plasticity. This process is called plasticizing. The main factors determining the plasticization quality are the heat applied to the material and the shear force it experiences. Heating the material in the barrel relaxes the polymer molecules, facilitating the transformation from solid to liquid. This process is closely related to the plastic’s properties, control of process conditions, and the structure of the plasticizing unit in the injection molding machine.
Injection Process:
The injection process can be divided into several stages: mold filling, holding pressure, backflow, cooling after gate freezing, and demolding.
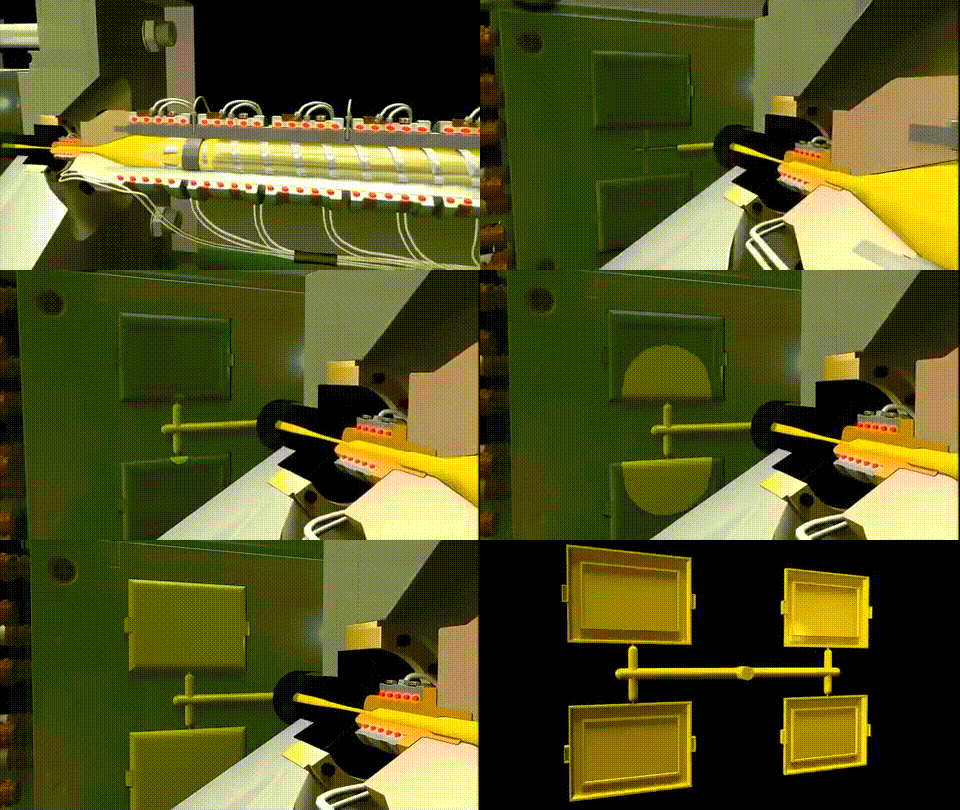
(1) Mold Filling: The plasticized melt is pushed by the plunger or screw to the front of the barrel and is injected into the mold cavity through the nozzle and gating system. This stage is called mold filling.
(2) Holding Pressure: As the melt cools and shrinks in the mold, pressure is maintained by the plunger or screw to ensure that the molten plastic near the gate continues to fill the mold. This allows the molded part to form a complete and dense structure, a phase known as holding pressure.
(3) Backflow: After the holding pressure stage, the pressure in the mold cavity decreases. If the gate has not yet frozen, backflow may occur, where molten material flows backward, causing defects like shrinkage, deformation, and porous texture in the part.
(4) Cooling After Gate Freezing: Once the plastic in the gating system has frozen, the pressure inside the barrel is released, new material is fed, and cooling media such as water, oil, or air is introduced to cool the mold further. This stage is known as cooling after gate freezing.
(5) Demolding: After the part has cooled to a certain temperature, the mold is opened, and the molded part is ejected from the mold using the ejection mechanism.
Post-Processing of Molded Parts:
After demolding or mechanical processing, plastic parts often require additional treatments, such as annealing or moisture conditioning.
(1) Annealing: This is the process of placing the molded part in a constant-temperature heated liquid medium or a hot air circulating oven for a while, followed by slow cooling.
(2) Moisture Conditioning: This process involves placing the freshly de-molded part in hot water to isolate it from the air, preventing oxidation and accelerating moisture absorption. The goal is to stabilize the part’s color, performance, and dimensions.
Learn more about Rilong Injection Molding


